Last updated November 18, 2026

Free written scope consultation - allowances, timeline, and change-order rules on paper before a single trade is scheduled
DIY vs Professional Bathroom Remodeling: What’s Safe to Do Yourself
A YouTube-guided tile job looks fine for six months – right up until the water damage behind the wall shows up on your neighbor’s ceiling in a Burbank condo, or your homeowner’s insurance denies a claim because unpermitted plumbing work was involved. That’s the part the tutorials skip. The real DIY question isn’t about whether you’re handy enough; it’s about which bathroom tasks carry hidden downstream consequences when they go wrong. Some of this work is genuinely safe for a careful homeowner. Some of it looks simple and can quietly compromise waterproofing, structural framing, or code compliance. This guide breaks the bathroom down task by task so you know exactly what to keep and what to hand off.
Quick Answer
Cosmetic work – painting, swapping fixtures, replacing a vanity top, regrouting, new hardware and lighting – is genuinely safe to do yourself. Anything that touches the waterproofing envelope (shower pans, wet-wall tile, tub surrounds) or moves plumbing, gas, or electrical circuits is not a DIY job: in California it either requires a licensed trade or a permit with inspection, and mistakes there fail silently behind the wall and show up as rot, mold, or a denied insurance claim. In Burbank, permitted plumbing and electrical work has to be done by or under a licensed contractor, so the tier system below is also a legal map, not just a skill one.
Styles & brands we work with
- Kitchen remodeling
- Bathroom remodeling
- Home additions & ADU
- Roofing
- Windows & doors
- Driveway & pavers
- Fence
Table of Contents
- The Three-Tier System: What’s DIY-Safe, DIY-Risky, and Must Be Licensed
- Burbank and LA County Permit Rules That Make “Simple” Jobs Legal Work
- Why Waterproofing Is Categorically Different From Painting a Vanity
- DIY vs Pro: Where You Actually Save Money and Where You Lose It
- Plumbing and Electrical: The Silent Failure Zones
- Structural and Framing Work You Should Never Touch
- What to Look For in a Professional Bathroom Remodeler
- How a Typical Burbank Bathroom Remodel Runs, Start to Finish
The Three-Tier System: What’s DIY-Safe, DIY-Risky, and Must Be Licensed
Forget the vague “hire a pro if you’re not confident” advice. The useful split is by consequence, not confidence. Here’s how we sort bathroom tasks on real projects in Burbank.
Tier 1: Genuinely DIY-Safe
These tasks have visible results and cheap failure modes. If you get one wrong, you see it, fix it, and move on.
- Painting walls, ceilings, and trim
- Replacing a vanity faucet, showerhead, or toilet (on existing connections)
- Swapping cabinet hardware, towel bars, and mirrors
- Replacing a light fixture wired to an existing junction box (with the breaker off)
- Regrouting or resealing existing tile and caulk lines
- Installing a new vanity top on an existing, sound cabinet base
- Laying peel-and-stick or floating vinyl plank over a clean, level floor
Tier 2: DIY-Possible but Risky
Skilled, patient homeowners can finish these, but the failure is delayed and expensive. Ask honestly whether you have the time, tools, and tolerance for a do-over.
- Setting tile on dry floor areas or a dry backer board
- Removing and reinstalling a toilet (the flange seal and slope matter)
- Hanging cement backer board
- Small framing tweaks like moving a stud or adding blocking
- Building out a boxed-in niche or recessed shelf
Tier 3: Must Be Licensed (or Permitted) Work
These come with safety and legal exposure. Do them wrong and you’re not just fixing a mistake – you’re dealing with the city, your insurer, or both.
- Any new or relocated plumbing (drain, supply, or gas line)
- Electrical circuit changes, new outlets, GFCI wiring, or added exhaust fan runs
- Waterproofing a shower pan or wet-wall wet zone
- Removing or altering a load-bearing wall
- Relocating a toilet or moving a fixture’s rough-in
- Changes requiring a permit and inspection by the City of Burbank
Burbank and LA County Permit Rules That Make “Simple” Jobs Legal Work
This is where most homeowners get blindsided. In Burbank, a bathroom remodel that moves plumbing fixtures, adds electrical outlets or a new circuit, changes the exhaust fan’s route, or alters walls generally requires a building permit pulled from the City of Burbank’s Community Development Department. Cosmetic work – paint, tile replacement over the same footprint, a new vanity – typically does not. The line is drawn at anything structural, plumbing, mechanical, or electrical.
Here’s the part that makes it concrete. Because permitted plumbing and electrical work in California has to be performed by or under the direct supervision of a licensed contractor (C-36 for plumbing, C-10 for electrical), a homeowner who wants to “just move the drain over a foot” has actually triggered a licensed work requirement, a permit, and an inspection. Doing it without that paperwork is a code violation. It can also complicate a future sale, because Burbank buyers’ inspectors and the city’s records will surface unpermitted work at the worst possible time – during escrow.
Condo owners in Burbank face a second layer: HOA and building rules often require signed contractor submittals and insurance before anyone touches a shared wall or the waterproofing over a neighbor’s unit. We’ve seen a “quick shower tile redo” turn into a condo-wide water containment problem when a DIY pan failed above a downstairs unit in the Magnolia Park area. The HOA paperwork alone would have forced a licensed, insured pro onto the job.
One practical habit: before you buy a single bag of thinset, call the city’s permit desk and describe the exact scope. Ask specifically whether a permit is required. Their answer is the one your insurance company will care about later.
Why Waterproofing Is Categorically Different From Painting a Vanity
Painting a vanity is reversible. You sand, you repaint. Waterproofing a shower is a one-shot system where the mistake is invisible at install and catastrophic 12 to 24 months later. That difference is why we put waterproofing in Tier 3 no matter how experienced the homeowner is.
Here’s what a proper wet-zone assembly does: a continuous waterproofing membrane (bonded or sheet, applied over a sloped floor and up the walls at least the height of the showerhead) directs water to the drain. The slope has to be right – typically a quarter-inch per foot toward the drain – and the pan liner or coating has to be continuous with proper corners. If any of that is off, water pools, the pre-slope is wrong, or the seams aren’t lapped with the manufacturer’s fabric, you get a slow leak that rots the subfloor from underneath while the surface tile still looks perfect.
There’s a second layer: vapor and moisture. Burbank’s summers are dry, so a small plumbing weep can evaporate silently for months and hide itself. Then winter rain raises humidity and the trapped moisture blooms into visible mold. We’ve seen it in older Burbank homes in the Rancho Equestrian area where shower pans were set over wood subfloor without a proper Slip-Sheet and liner.
This isn’t a “be careful” warning. It’s a “the manufacturer’s warranty on your shower membrane and the tile setter’s warranty both go void if it’s not installed to spec, and the failure is behind the wall” warning. No tile job done over a failing pan is repairable without full demolition. That’s the reason to hire a licensed professional for the waterproofing envelope and keep the visible tile work to a pro too, because the two are inseparable.
If you want the bathroom’s structure, plumbing, and tile all handled under one accountable contract, a full-scope bathroom remodeler like those we connect you with through Groundwork Construction Co. of Burbank home is the cleaner path than coordinating separate tile and plumbing subs.
DIY vs Pro: Where You Actually Save Money and Where You Lose It
Most DIY cost-benefit math stops at the materials estimate. The accurate version adds the cost of a fix-it call, a permit penalty, or a redo – and once you include those, the savings picture flips for a subset of tasks. Here’s an honest line-item view of a mid-range Burbank bathroom refresh.
- Paint and trim: DIY saves real money ($400-$900 in labor) with low redo risk. Worth it.
- Vanity and fixtures swap: DIY saves $300-$700. Worth it if connections are existing and sound.
- Tile in a dry area: DIY saves $800-$1,500, but a bad layout or lippage costs $600-$1,200 to correct. Toss-up.
- Shower pan and wet-wall tile: DIY saves $1,800-$4,000 in labor but a failed pan costs $6,000-$14,000 to fully demolish and rebuild, plus water mitigation. Do not DIY.
- Relocated plumbing fixture: DIY saves nothing legally (you still need a licensed pro for the permit), and a bad drain slope or joint costs $1,000-$3,500 to unrecover.
- New electrical circuit for a heated towel bar or exhaust fan: No real savings once the permit and licensed electrician are required, and the fire risk isn’t worth quantifying.
In practice, a homeowner in Burbank doing only the Tier 1 work and hiring out the rest saves roughly $1,000-$2,200 net – and gets a bathroom where the part that matters (water containment) is warrantied. The homeowners who try to save $3,000 by doing the shower themselves are the ones calling us two years later for a demolition-and-rebuild quote.
If you’re also updating the exterior of the home as part of a larger improvement plan, an experienced contractor can coordinate the whole scope from foundation to finish line. See our Driveway & Pavers in Burbank page for how exterior hardscape work pairs with interior remodels.
Plumbing and Electrical: The Silent Failure Zones
Plumbing and electrical failures don’t announce themselves at install. They announce themselves months later as a slow drip, a corroded fitting, a breaker that trips, or a scorched outlet. That delayed reveal is why neither belongs in the DIY column in Burbank.
Plumbing. A bathroom’s drain line needs a continuous slope and correct trap geometry; a relocated P-trap that’s slightly off holds water, smells, or clogs. Supply joints that look tight can weep behind the wall. A toilet flange set too high or too low leaks at the wax ring – a classic failure we see when homeowners reinstall a toilet after DIY floor tile. And in California, moving or adding plumbing fixtures is permitted work that requires a licensed C-36 plumber.
Electrical. Bathrooms are a wet location, so the code requires GFCI protection on receptacles and specific rules near the shower and tub. An exhaust fan that dumps into the attic instead of venting outside (a common shortcut and a code violation) breeds moisture and mold right where you can’t see it. Adding a circuit, running a new line for an exhaust fan, or adding an outlet all need a licensed C-10 electrician and a permit in Burbank. The risk isn’t a blown breaker; it’s fire inside the wall.
The safest rule: if a task requires opening a wall, cutting a circuit, or touching a drain, stop. That task is a phone call, not a weekend project.
Structural and Framing Work You Should Never Touch
Bathroom remodels tempt people to “just open up the wall” for a bigger shower or move a wall to gain a foot. In Burbank’s older housing stock – much of it built from the 1920s through the 1950s – the wall you’re cutting into may be load-bearing, may contain old knob-and-tube-adjacent wiring, or may sit on a framing system that was overbuilt to carry weight you can’t see.
A load-bearing wall carries the roof or upper floor above it. Removing or notching one without an engineered beam and city permit can cause sagging, cracked plaster, or worse. Even non-load-bearing framing changes in a bathroom have to account for the weight of tile, mortar, and a filled tub. A floor joist that’s slightly undersized causes deflection, and deflection cracks the tile and breaks the grout lines – the top complaint from homeowners six months after a DIY bathroom redo.
Bathroom ventilation, moisture, and structural repair are a package. When a remodel turns into a wall-opening project, an experienced framing and finish team working under one contract matters. If the project extends past the bathroom into adding square footage, our Home Additions & ADU in Burbank guide walks through what that scope looks like.
What to Look For in a Professional Bathroom Remodeler
If you’re hiring out Tier 2 and Tier 3, the vetting is where most homeowners lose money. A vague bid and a handshake is how the wrong crew gets in. Use this checklist:
- A written, line-item quote. Materials, labor, permits, and allowances broken out. If a bid is a single lump sum with “as needed” language, ask for detail before signing.
- Permits pulled by name. The contractor should be the one obtaining the Burbank permit and coordinating the city inspections – not leaving that to you.
- A real workmanship warranty, in writing. Bathroom waterproofing and tile work need a warranty that outlasts the first shower. Our 730-Day Done Right Promise exists precisely because tile and waterproofing failures show up in year two, and “we’ll see what we can do” isn’t a warranty.
- Upfront pricing, no surprises. The number you see is the number you pay. Change orders should be for scope changes you approved in writing.
- Background-checked, uniformed technicians. Anyone entering your home should be verified and identifiable. Ask.
- A named point of contact and a clear schedule. “Who’s coming Tuesday and what are they doing?” should have a real answer.
You can also check the contractor’s license status through the California Contractors State License Board before signing anything.
How a Typical Burbank Bathroom Remodel Runs, Start to Finish
Knowing the actual sequence helps you plan around the disruption – and see exactly where DIY would collide with licensed work in real time.
- Design and selections (1-2 weeks). Tile, fixtures, vanity, finishes chosen before demo starts. In Burbank’s older homes, add a site check for hidden issues.
- Permit pull (1-3 weeks depending on scope). Handled by the contractor. This is the step DIY skips, and the one that catches up later.
- Demo and rough-in (3-5 days). Tear-out, then licensed plumbing and electrical changes with rough inspection.
- Waterproofing and tile (5-8 days). The step worth protecting. Membrane, slope, corners, cure times.
- Fixtures, finishes, and final inspection (5-7 days). Vanity, toilet, paint, trim, exhaust fan, and final city inspection.
Total realistic window for a mid-range bathroom: three to five weeks. A DIY plan that only budgets weekends stretches to two months and still can’t clear the permit step without a licensed trade.
Common Mistakes to Avoid
- Assuming tile over an old waterproofing layer is “cheap.” It fails from the inside. In our experience, tile set over a failed pan in older Burbank homes is the most common cause of a full redo call.
- Moving a toilet “just a little.” The drain slope and flange height are unforgiving, and in California it’s permitted work requiring a licensed plumber.
- Skipping the permit to save time. Burbank records will surface it at inspection or at sale, and unpermitted work can void a homeowner insurance claim.
- Venting the bathroom exhaust fan into the attic. Common DIY shortcut, code violation, and a mold source. It has to go outside.
- Buying tile before confirming the substrate. Old Burbank homes often have uneven framing or a bowed floor. Buy tile after the substrate is checked.
- Hiring on the lowest bid without a warranty in writing. The cheapest quote is often the one with the least recourse when the shower leaks in year two.
- Underestimating the HOA submittal for a Burbank condo. Building and HOA approval can add two weeks and usually requires a licensed, insured contractor on the paperwork.
See the difference
 Before
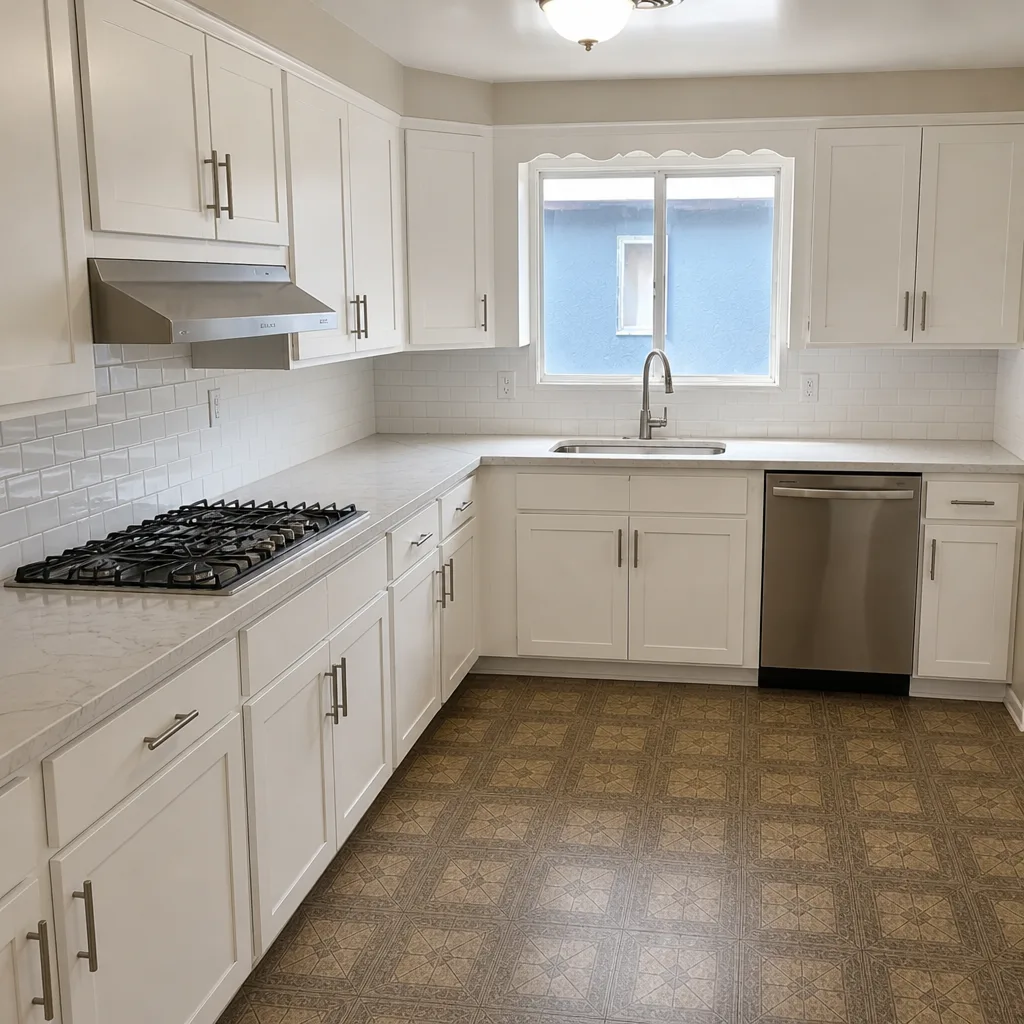 After
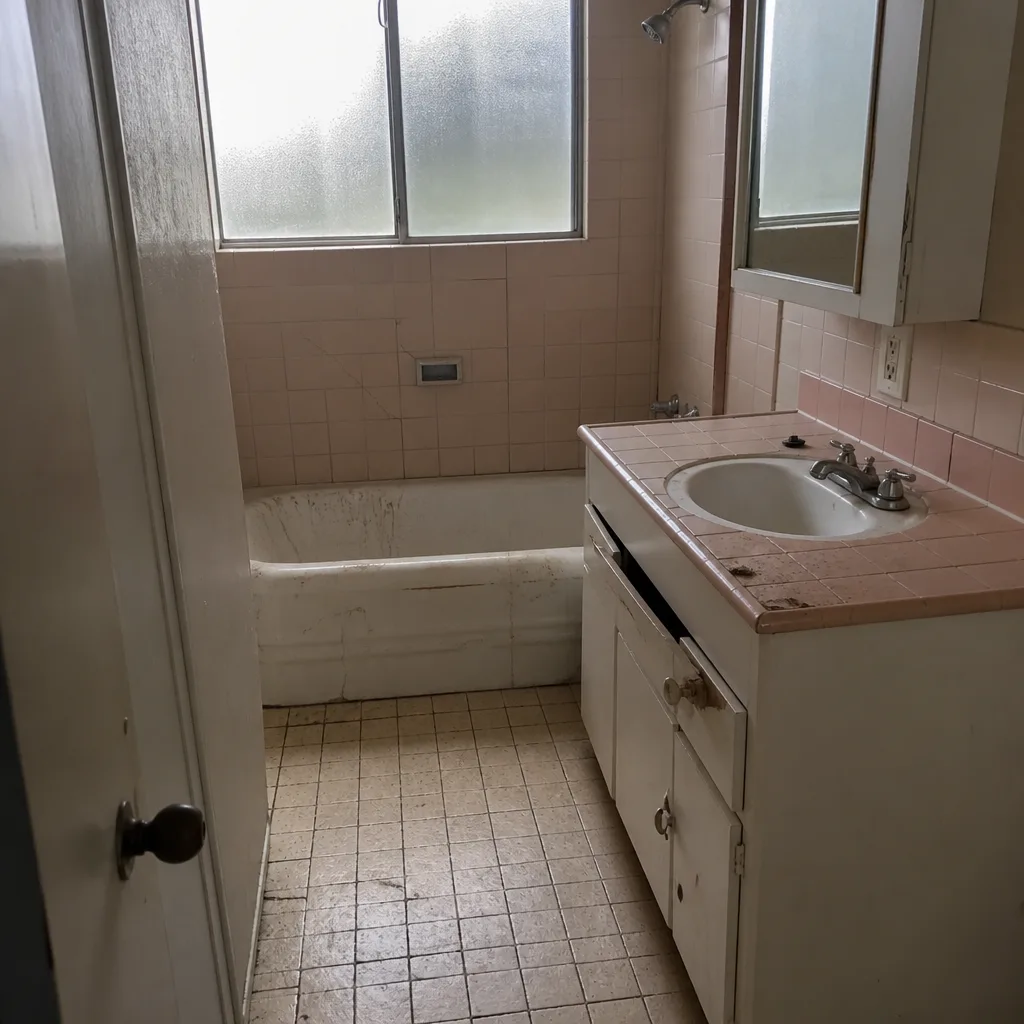 Before
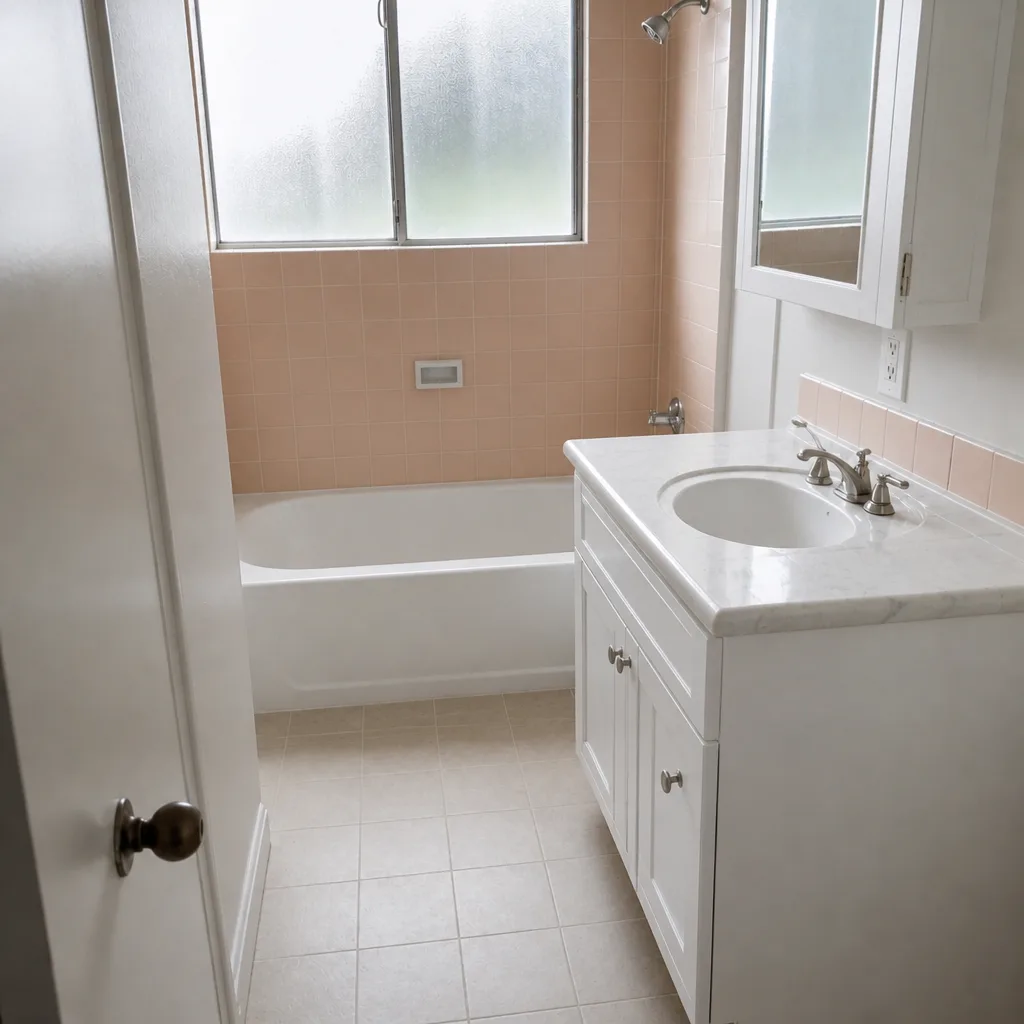 After
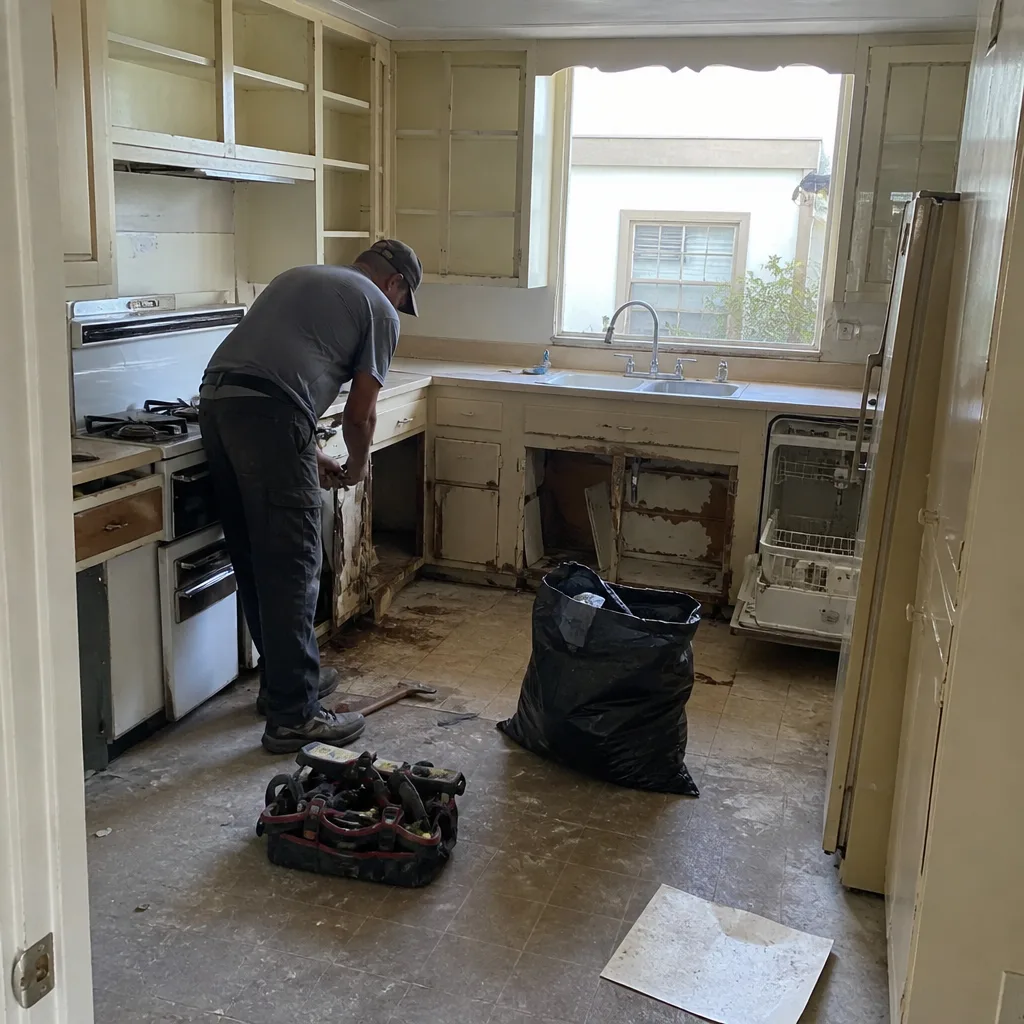 Before
 After
When to Call a Professional
Call a professional the moment your scope touches waterproofing, a drain, a circuit, or a wall. That covers the shower, the tub surround, any relocated fixture, new outlets or exhaust fans, and any framing change – and if a permit is involved, the call isn’t optional. It’s also worth the call if you’re already seeing the signs of a previous DIY problem: soft flooring near the shower, a persistent musty smell, cracked grout lines that keep returning, or a stain appearing on the ceiling of the room below the bathroom. A free estimate will tell you whether it’s a repair or a rebuild. Groundwork Construction Co. of Burbank offers free estimates in Burbank – call (844) 797-7958. Calls are answered by a live person around the clock, so you’re never stuck waiting on a callback. And the same team that delivers a bathroom can handle exterior upgrades from foundation to finish line, such as a Fence Installation in Burbank.
Frequently Asked Questions
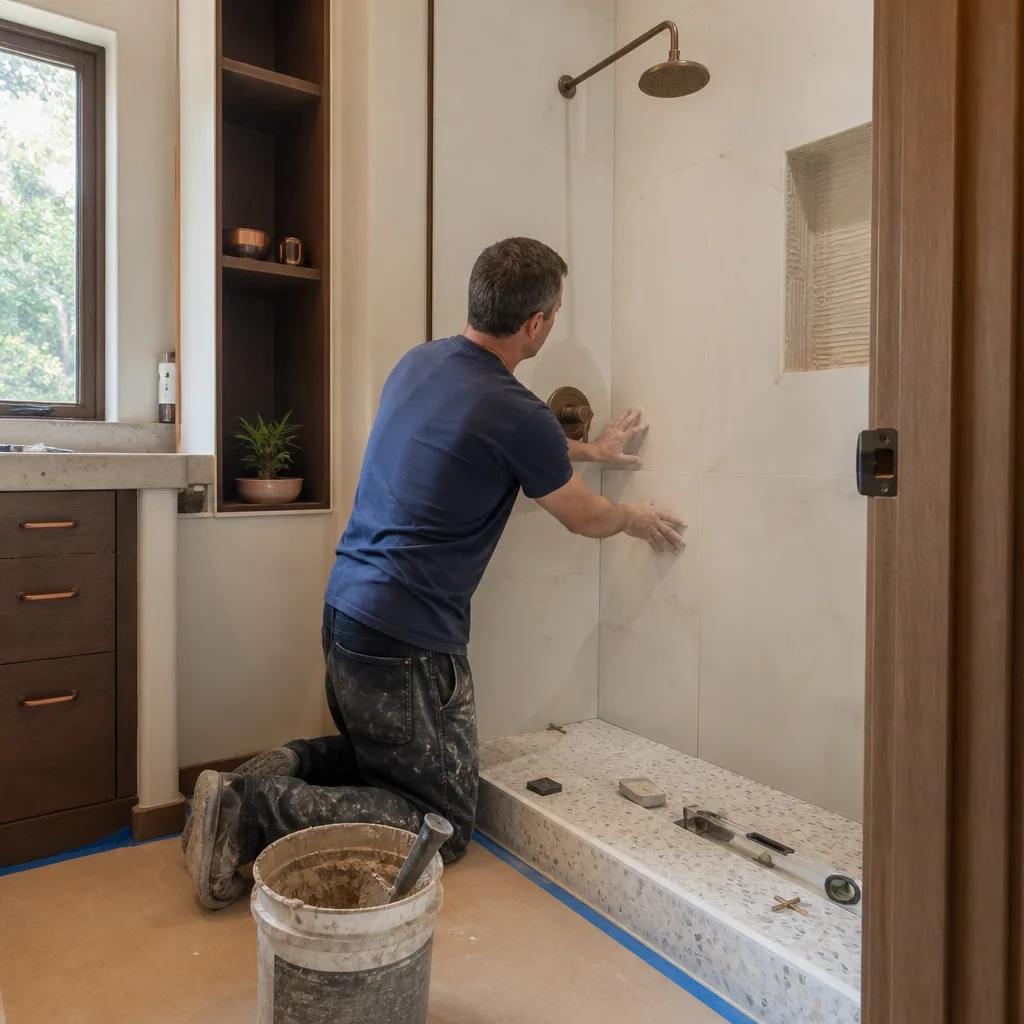
Generally no – for anything beyond like-for-like fixture replacement. New or relocated plumbing, drain changes, and supply-line work in Burbank require a permit, and permitted plumbing in California must be performed by or under a licensed C-36 contractor. Swapping a faucet or showerhead on existing connections is typically fine to do yourself. If you’re unsure where the line is, call (844) 797-7958 – a quick free estimate will clarify the scope.
Tiling the surface is only half of what a shower involves, and the waterproofing membrane and sloped pan underneath are the part that fails. A failed DIY shower pan typically costs $6,000-$14,000 to fully demolish and rebuild, plus water mitigation, so the labor savings don’t hold up against the redo risk. For a wet-zone shower, hire a licensed professional.
Cosmetic work – paint, tile over the same footprint, a new vanity – usually doesn’t require a permit; anything structural, plumbing, mechanical, or electrical does. That means moving a fixture, adding an outlet or circuit, or altering a wall triggers the City of Burbank permitting and inspection process. Calling the city’s permit desk with your exact scope before you start is the fastest way to know for sure.
Waterproofing failure behind the wall. It’s invisible at install and shows up 12 to 24 months later as rot, mold, or a leak into the room below – often a neighbor’s ceiling in a condo. Because Burbank’s dry summers can mask a slow weep for months, the problem has time to spread before anyone notices.
A homeowner who does only the Tier 1 work – paint, fixtures, vanity, trim – and hires out waterproofing, plumbing, and electrical typically saves $1,000-$2,200 net. Chasing more savings by doing the shower or moving a drain usually costs more in the two-year window than it saves upfront.
Ask for a written, line-item quote, confirmation that the contractor is pulling the Burbank permit and coordinating inspections, and the workmanship warranty in writing. Check license status through the California Contractors State License Board. Our 730-Day Done Right Promise is a two-year workmanship guarantee – if it’s not done right, we make it right – and every technician is background-checked and uniformed. Call (844) 797-7958 for a free estimate and design consult.
The Bottom Line
The DIY question is a decision about consequence, not confidence. Keep the Tier 1 cosmetic work – paint, fixtures, a vanity top, regrouting – and you’ll save real money with a cheap fix if you slip. Hand off every task that touches the waterproofing envelope, plumbing, electrical, or framing: those failures hide behind the wall, surface a year or two later, and in Burbank also trigger permit and insurance problems. The homeowners who come out ahead are the ones who draw that line clearly up front. If you want the licensed, permitted, warrantied half of the job handled under one contract with upfront pricing and financing options available, call the Groundwork team.
Ready to price it out? Call (844) 797-7958 for a free estimate on your Burbank bathroom remodel. We offer upfront pricing, a free project estimate and design consult, 0% financing for 18 months, and $1,000 off projects over $10,000 – all backed by the 730-Day Done Right Promise.
Written by the team at Groundwork Construction Co. of Burbank.