Last updated November 18, 2026



Free written scope consultation - allowances, timeline, and change-order rules on paper before a single trade is scheduled
Driveway & Pavers Maintenance Schedule: What to Do and When
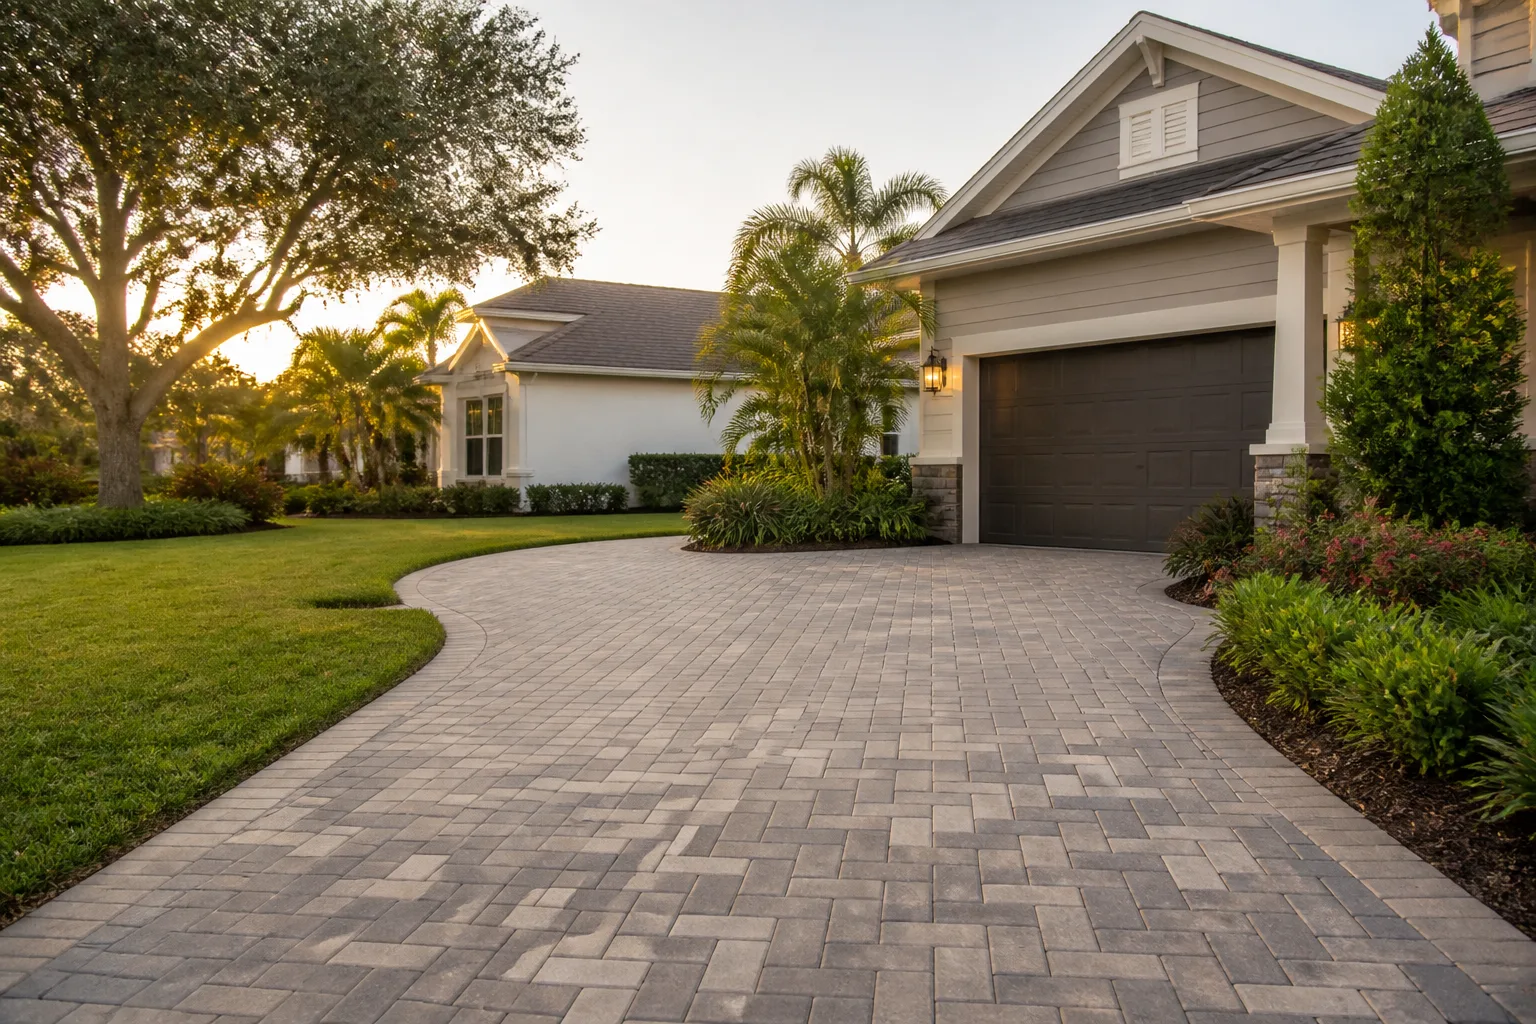
Sealing pavers that haven’t been cleaned first is one of the most common homeowner mistakes we see in Burbank. It locks in staining, traps moisture, and accelerates surface degradation instead of preventing it. A paver driveway isn’t a single surface you “seal every few years” and forget. It’s a layered assembly: base, bedding, pavers, joint sand, edge restraint, and surface sealer. Each layer needs attention on its own clock, and the Burbank climate does not treat all of them equally. In this guide we lay out a realistic month-by-month schedule keyed to Burbank weather, explain the difference between penetrating and topical sealers, and show you how to tell whether your paver system is ahead of or behind the maintenance curve.
Quick Answer
In Burbank, inspect your paver joints and edge restraints every spring and early fall, re-sand polymeric joints when you can push a key or screwdriver shank more than about 1/2 inch into a joint, and evaluate surface sealer every 24-36 months on a properly cleaned surface. Never seal over trapped moisture or unremoved staining – the surface must be clean, dry, and free of efflorescence first. Most Burbank driveways need a penetrating sealer at 12-18 months after install and a refresh every 3-5 years thereafter, depending on sun exposure and traffic.
Styles & brands we work with
- Kitchen remodeling
- Bathroom remodeling
- Home additions & ADU
- Roofing
- Windows & doors
- Driveway & pavers
- Fence
Table of Contents
- Why a Paver Driveway Is a Layered System, Not a Surface
- The Burbank Paver Maintenance Calendar, Month by Month
- Penetrating vs. Topical Sealer: Which Do You Actually Need?
- Inspecting Polymeric Sand Without Disturbing the Joints
- Edge Restraint Inspection: The Most Neglected Task
- What a Paver System Should Look Like at 5, 10, and 15 Years
- Weed Treatment Timing in Burbank’s Climate
- Common Mistakes to Avoid
Why a Paver Driveway Is a Layered System, Not a Surface
When a paver driveway fails in Burbank, it usually isn’t the pavers themselves. It’s the layers underneath and between them. A properly built driveway is a stack of six components, and each one ages at a different rate. Conflating them into a single “seal it every couple of years” routine is how homeowners end up with rutting, shifted edges, and weed pressure that a fresh sealer can’t fix.
From the bottom up, here’s what you’re actually maintaining:
- Compacted subbase – the structural layer. In Burbank’s expansive clay soils, this is where differential settlement starts if drainage is wrong. A subbase doesn’t need sealing; it needs to stay dry and undisturbed.
- Bedding sand – the level layer that cushions pavers. Doesn’t need maintenance but fails fast if water reaches it.
- Pavers – the visible surface. Fades slightly with UV over 15-20 years; chips from dropped loads and steel-wheeled dollies.
- Joint sand (usually polymeric) – locks the assembly together and keeps water out of the bedding. Consumed slowly by surface traffic and drying; needs top-ups.
- Edge restraint – the concrete or plastic curb that holds the field. Once compromised, the field shifts and no amount of re-sanding helps.
- Surface sealer – optional but common. Protects color and surface, forms a wear layer, needs periodic reapplication.
Each of those has its own maintenance interval, and the thermostat is Burbank’s weather. Long, dry, sun-heavy summers. Modest rain concentrated between roughly November and March. Occasional Santa Ana wind events that dry things out fast, and hot late-summer afternoons that push surface temperatures on unshaded pavers well above air temperature. The East Coast “seal every fall” advice does not transfer here. Neither does the Pacific Northwest “watch for moss” guidance. Burbank’s rhythm is dry-and-sunny, then wet, then back to dry, and the maintenance schedule should follow that.
If your driveway is due for a full rebuild, look at how a properly constructed Driveway & Pavers in Burbank project is built from subbase to surface. If you don’t yet have a paver driveway, everything below still applies – just starting at year one.
The Burbank Paver Maintenance Calendar, Month by Month
Here’s the schedule we’d put on any Burbank homeowner’s calendar if we installed the driveway. It runs on a two-cycle year: a light-touch inspection and cleanup, and a heavier seasonal transition before the rains arrive. The point isn’t to do all of it. It’s to do the right one at the right time.
January – February: Post-Rain Damage Check
Walk the driveway after the first heavy storm of the season. Look for standing water anywhere it shouldn’t pond, missing joint sand after heavy sheet flow, and any paver that has started to rock when you step on it. A single rocking paver in a Burbank driveway in February is a small problem now and a resanding-and-relaying problem by next November. Address the water source before you touch the joints.
March – April: Spring Weed, Efflorescence, and Joint Inspection
This is the big inspection window. Pull weeds while they’re small (they come out easiest now), assess white efflorescence haze on the surface, and do a full joint-depth probe on three or four representative areas. If you see polymeric sand crumbling or washing out of the low side of the driveway, that’s a re-sand candidate before the dry season locks in.
May – June: Pre-Summer Cleaning
Pressure-wash only if needed and only at low pressure with a wide fan tip – a turbo nozzle on pavers removes the surface skin and accelerates wear. This is also the best window to address oil drips and tire marks before they bake in. Once a stain sets up in the heat of a Burbank July, it is much harder to remove.
July – September: UV and Sealer Check
This is your sealer evaluation window. Sun exposure on Burbank’s unshaded west- and south-facing driveways is intense, and a topical sealer will break down on those surfaces 12-18 months sooner than on a shaded driveway. Check for chalking, hot-tire pickup, and dulling. If your sealer beads water in March but no longer beads in August, it’s near its refresh window.
October – November: Pre-Rainy-Season Prep
Do the two things that keep Burbank rain from doing damage: verify the edge restraint at the downhill end of the driveway (see below for the full protocol), and top off any joint sand that has dropped below the paver chamfer. This is the single most worthwhile maintenance window of the year, and it’s the one most homeowners skip.
December: Reset and Drainage Walk-Through
Confirm the driveway slopes away from the house, not toward it. Check that rain gutters discharge past the driveway, not onto it. Burbank’s heavier storm events in December and January expose exactly this kind of oversight, and the resulting settlement of the bedding sand is not always obvious until the following summer.
Penetrating vs. Topical Sealer: Which Do You Actually Need?
The two sealers do completely different jobs, and matching the wrong one to your installation’s life stage is how homeowners end up disappointed. Penetrating sealers soak into the paver and repel water from within. Topical sealers form a film on top. A new driveway typically benefits from one, a driveway at year 10-15 typically benefits from the other, and an old driveway that has never been sealed is usually a mistake waiting to happen if you just slap the wrong product on it.
Penetrating Sealer
- Soaks in, leaves the paver surface visually unchanged (or very lightly enhanced)
- Best for new paver installations and driveways where original paver color is what you want to keep
- Doesn’t peel or delaminate because there’s no film to fail
- Typical refresh interval on Burbank sun-facing pavers: 3-5 years
- Apply after 30-90 days of cure on a new install, and always after a proper clean
Topical Sealer
- Forms a visible film on the paver – often “wet look” or color-enhanced
- Best for aged pavers where the film helps lock surface, revive color, and bridge micro-pitting
- Requires full removal and reapplication when it starts to peel or chalk
- Typical refresh interval on Burbank sun-facing pavers: 24-36 months, sometimes less on the hottest exposures
- More demanding prep – any trapped moisture under a topical film causes hazing, bubbling, and rapid failure
The rule we’d give any Burbank homeowner: never use a topical sealer over a paver system that has unresolved efflorescence, joint-sand deficiency, or visible ponding. It seals in the problem instead of addressing it. Fix the underlying layer first, seal second.
A background-checked, uniformed technician on a proper Fence Installation in Burbank project will be doing much of the same moisture-management thinking on the fence line that your driveway needs – the two sit next to each other and share the same drainage problems.
Inspecting Polymeric Sand Without Disturbing the Joints
Most homeowners damage their joints while inspecting them. The inspection should be non-invasive. You want to know two things: how deep the sand goes, and how firm the top 1/4 inch is. Both can be answered without digging out a joint.
- Pick three test areas, not one. A sunny section, a shaded section, and the low side of the driveway where water sits longest. Burbank driveways rarely age at the same rate in all three places.
- Press, don’t dig. Use your fingertip, a wooden dowel, or the shank of a screwdriver. Press gently. If the top of the joint feels firm and there’s sand visible at or just below the paver chamfer, the joint is healthy.
- Watch for the threshold. If a key or screwdriver shank penetrates more than about 1/2 inch with light hand pressure, the joint is deficient. Spot-fix if two or three joints fail; re-sand the full driveway if more than about 10% of joints fail across any test area.
- Look for voids, not just softness. Wide V-shaped voids under the paver chamfer are a bigger problem than shallow softness. Voids accelerate because traffic keeps releasing sand into them.
- Check for cracks or dust. Polymeric sand that has cracked in a joint is no longer performing. That joint needs to be removed and refilled cleanly, not topped off.
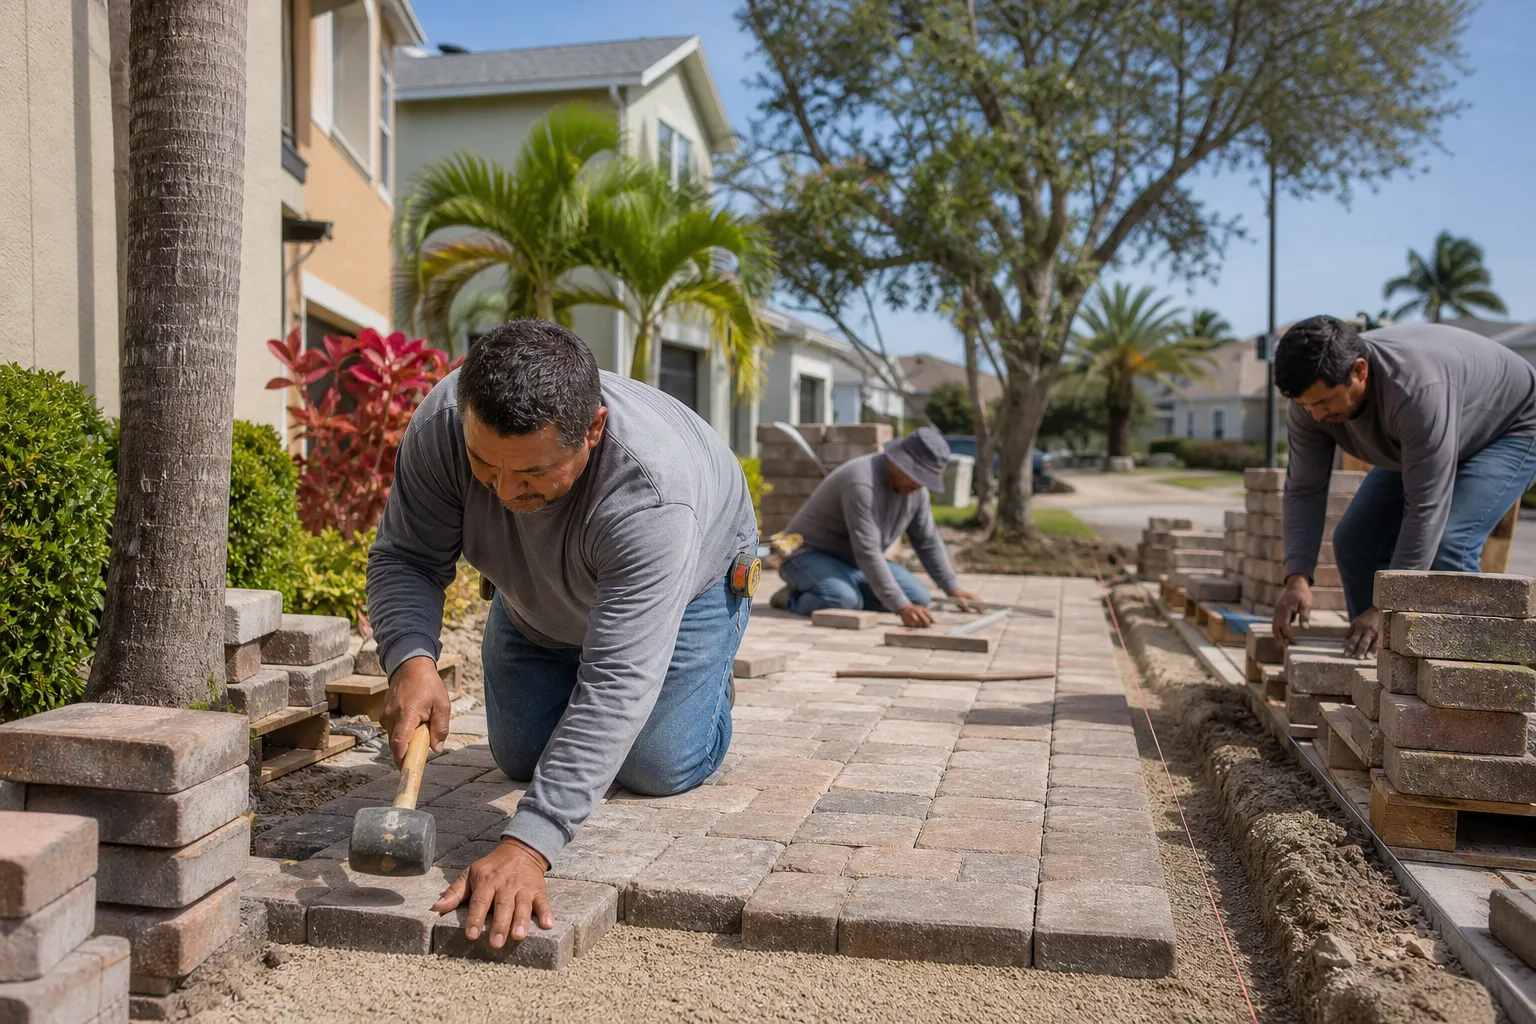
Re-sanding is best done in Burbank’s dry window, typically April through October, after the pavers are fully dry. Never re-sand in a Burbank wet week – the new polymeric sand sets up around moisture and won’t bond properly. A quick pass with a plate compactor to finish, plus a light mist to activate the polymer, is the standard approach.
Edge Restraint Inspection: The Most Neglected Task
If we could only ask Burbank homeowners to do one maintenance task, it wouldn’t be sealing. It would be checking the edge restraint. This is the concrete or plastic curb that holds the outer ring of pavers from spreading outward. It’s buried around the perimeter of every paver driveway, and once it moves even 1/4 inch, the whole field starts walking toward the downhill side. In Burbank, that downhill side is often where the driveway meets the street, and once the outer course is loose, removing and resetting it is a much bigger job than it should have been.
The 5-Minute Edge Inspection
- Straddle the driveway edge and push the outer course of pavers inward with the flat of your foot. Zero movement is what you want. Any rocking or a visible widening gap between the outer paver and the paver next to it means the restraint is failing or already gone.
- Look for cracks in the restraint itself. A visible crack in the concrete restraint beam, or a broken plastic edge, is the trigger point. In Burbank’s expansive clay, restraint cracking is often a drainage problem upstream – water softening the soil behind the beam.
- Probe the base under the restraint at two or three points. Use a screwdriver handle or your thumb to press into the soil right where the restraint meets the ground. Soft, spongy soil here is a warning that the subbase has been compromised and water is pooling behind the restraint. Don’t wait for a visible shift to act on this.
If you find movement, don’t just push the pavers back into line. That’s the mistake. The restraint needs to be reset or replaced, the base under it recompacted, and the paver course refit before the joints are refilled. This is one of the tasks where we’d strongly suggest a contractor – a failed restraint reset done wrong simply fails again next season, and the driveway can end up needing edge removal in the field, not just the perimeter.
What a Paver System Should Look Like at 5, 10, and 15 Years
Age alone doesn’t tell you whether your Burbank driveway is on track. The maintenance you actually did matters more. Here’s what a well-maintained system should look like at each milestone, and the signs that you’re running ahead of or behind schedule.
Year 5
- On track: Pavers still uniform in color; joints full and firm across the field; edge restraint tight; at most one sealer refresh since install; no standing water after a storm.
- Ahead of schedule: Original penetrating-sealer finish still beading on the sunny side; zero weed incursions in the field; edge course still firm when pushed.
- Behind: Noticeable color mottling from uneven sun exposure, thin sandy patches at high-traffic corners, first weed encroachment from the joints, or a sealer that has been applied over the top of existing staining.
Year 10
- On track: Minor color fade on the sun-facing side only; two or three spot re-sands since install; sealer refreshed at least once; edge restraint still holds when pushed.
- Ahead of schedule: Surface still feels tight underfoot, no rocking pavers at all, joints have steady full depth with no V voids, weeds absent from a scouted perimeter check.
- Behind: Rocking pavers at the driveway-street transition, widespread joint sand deficiency, efflorescence recurring in the same spots every wet season, shallow tire grooves where cars turn.
Year 15
- On track: Visible UV fade is even and matches the driveway’s sun exposure pattern; 2-3 full sealer refreshes behind you; sub-surface still firm; edge restraint still intact; weeds contained to the perimeter.
- Ahead of schedule: Original color still strong, field still stable, joint sand maintained every 2-3 years, no subbase-related settlement.
- Behind: Field starting to “walk” toward the street edge; soft spots under the pavers after rain; two or more rocking pavers; sealer film peeling or chalking; recurring joint-sand washout, which usually points to a drainage issue underneath rather than a joint-sand issue.
If you’re at year 15 and the driveway still reads as on-track with a maintenance log to back it up, you’re looking at another decade of service. If it reads as behind, the right call is a proper evaluation, not another sealer coat.
Weed Treatment Timing in Burbank’s Climate
Weeds in paver joints are not a maintenance failure you fight forever – they’re a live cycle you interrupt at the right moment. In Burbank, that cycle opens in spring when soil moisture returns and closes when summer heat dries the surface. The most effective window to attack weeds is late March to mid-April, when they’re small, before they go to seed. Pulling by hand works. Herbicide is a fallback, not a first move; pre-emergent products applied to joint sand can interfere with the polymeric performance if they aren’t matched to it.
The bigger insight is diagnostic: if you’re pulling weeds out of the same joint every season, that joint is not doing its job. Weeds grow where the polymeric sand has failed, which means you have a re-sand issue, not just a weeding issue. This shows up repeatedly in Burbank because the city’s dry summers and occasional intense winter storms create the daily moisture swing that opens joints fastest.
Treatment timing, by season:
- Late March to mid-April: Hand-pull or spot treat. This is the highest-leverage window of the year.
- June to July: Spot-pull anything that returned; treat the perimeter edge where the restraint meets soil, since that’s the most reliable weed entrance.
- October to November: Clean edge-course joints and top off any joint sand before the rains. Weed seed deposited on top of fresh polymeric sand has a much harder time taking hold.
If you’re considering additions or a bigger change to the property that touches the driveway, the same drainage thinking matters to the wider plan. See our Home Additions & ADU in Burbank page for how a new structure and the existing driveway need to coordinate on grading.
Common Mistakes to Avoid
- Sealing before cleaning. Sealing over stain, efflorescence, or surface dust locks it in and accelerates degradation instead of preventing it. The surface has to be clean, dry, and structurally sound first.
- Re-sanding without addressing why the sand failed. The first rainstorm after a re-sand will wash out the new polymeric sand if the underlying drainage problem isn’t fixed. Burbank’s dry summers don’t expose this because there’s no water to move – the failure shows up in January.
- Using a pressure washer turbo tip on pavers. High-pressure, narrow-angle tips remove the top surface skin and expose the aggregate underneath. A wide fan tip at low pressure is fine. High pressure on the same spot is not.
- Pushing loose pavers back into line. If you can push a paver back into place by hand, the edge restraint or the base under it has failed. Pushing it looks fixed for a few weeks; it’s actually a bigger job by next season.
- Ignoring the low corner. Any spot in a Burbank driveway that ponds water for more than a day after a storm is where bedding sand will settle and pavers will eventually loosen. Fixing the source – often a gutter that dumps onto the driveway – is cheaper than fixing the pavers.
- Sealing in the wrong season. Polymeric sand and most sealers don’t set correctly if applied when the surface is cool and damp. In Burbank, the reliable windows are April through October, with a preference for clear, moderate weather.
- Skipping the pre-rainy-season walk. The single most valuable 15 minutes of maintenance per year is the November edge-and-joint check. It’s the one that prevents the January problem that becomes a March repair.
See the difference
 Before
 After
 Before
 After
 Before
 After
When to Call a Professional
Some of this schedule is genuinely homeowner maintenance – weeds, sealer checks, joint depth probes, drainage walks. Others aren’t. Call a professional if you’ve found more than one rocking paver, if the edge restraint has visibly moved or cracked, if water is ponding against the house or in front of the garage, if joint sand washes out within a month of a re-sand, or if the driveway is at the ten-year mark without a maintenance history. These are the signs that the problem is under the surface, not on it, and the correct fix lives in the subbase or the edge – not in another coat of sealer.
Groundwork Construction Co. of Burbank offers free estimates in Burbank – call (844) 797-7958. Every project is covered by our 730-Day Done Right Promise, so if it’s not done right, we make it right. Prefer to see the full scope of what we do first? Start at our Groundwork Construction Co. of Burbank home page.
Frequently Asked Questions
For a new paver driveway in Burbank, apply a penetrating sealer at 12-18 months after install and refresh every 3-5 years. On older pavers using a topical sealer, refresh every 24-36 months – faster on the sun-facing west or south exposure. Call (844) 797-7958 for an exact quote on a sealer refresh – estimates are free.
No. Well-installed polymeric sand in Burbank typically needs spot treatment every 1-2 years and a full re-sand every 4-6 years, depending on traffic and joint depth. If you’re re-sanding the same joints more often than that, the underlying drainage is the problem. Call (844) 797-7958 to have a technician evaluate the joints – estimates are free.
Yes, but only at low pressure with a wide fan tip (25- or 40-degree), and never with a turbo nozzle directly on paver faces. High-pressure narrow tips strip the surface skin and leave visible burn streaks that no sealer will hide. When in doubt, let a professional handle it – call (844) 797-7958.
Push the outer course of pavers inward with the flat of your foot. Movement of more than a hairline means the restraint is failing or already gone. In Burbank, edge-restraint failures are usually drainage problems behind the beam, not just a restraint that wore out. Call (844) 797-7958 for an inspection – estimates are free.
No. Wait 30-90 days for the pavers to cure and for any efflorescence to work its way out of the joint sand before applying a penetrating sealer. Sealing too early traps haze and moisture. Call (844) 797-7958 to schedule the sealer at the right window – estimates are free.
Ponding that lasts more than 24 hours after rain means the drainage is failing – usually due to a gutter that dumps onto the driveway, a subbase that has settled, or a slope that was never right. Don’t ignore it and don’t just add joint sand on top. Call (844) 797-7958 for a free evaluation of the drainage before it damages the pavers underneath.
The Bottom Line

A paver driveway in Burbank will last two to three decades with consistent maintenance – not because of every task on this list, but because of the right ones at the right times. The core schedule is a spring joint-and-weed check, a summer UV and sealer evaluation, a pre-rainy-season edge and joint-sand top-off, and a proper sealer refresh every 3-5 years. Penetrating sealer for new pavers, topical for older systems, always on a clean surface. Inspect the edge restraint every spring and every fall, because a failed restraint silently costs more than any other single maintenance gap. When something’s under the surface rather than on it, call a professional instead of reaching for another coat of sealer.
If you’d like us to walk the driveway and tell you honestly what stage it’s in, that’s what we do. Call (844) 797-7958 for a free estimate from Groundwork Construction Co. of Burbank.
Written by the team at Groundwork Construction Co. of Burbank.